(Last Updated/Reviewed Nov. 2020)
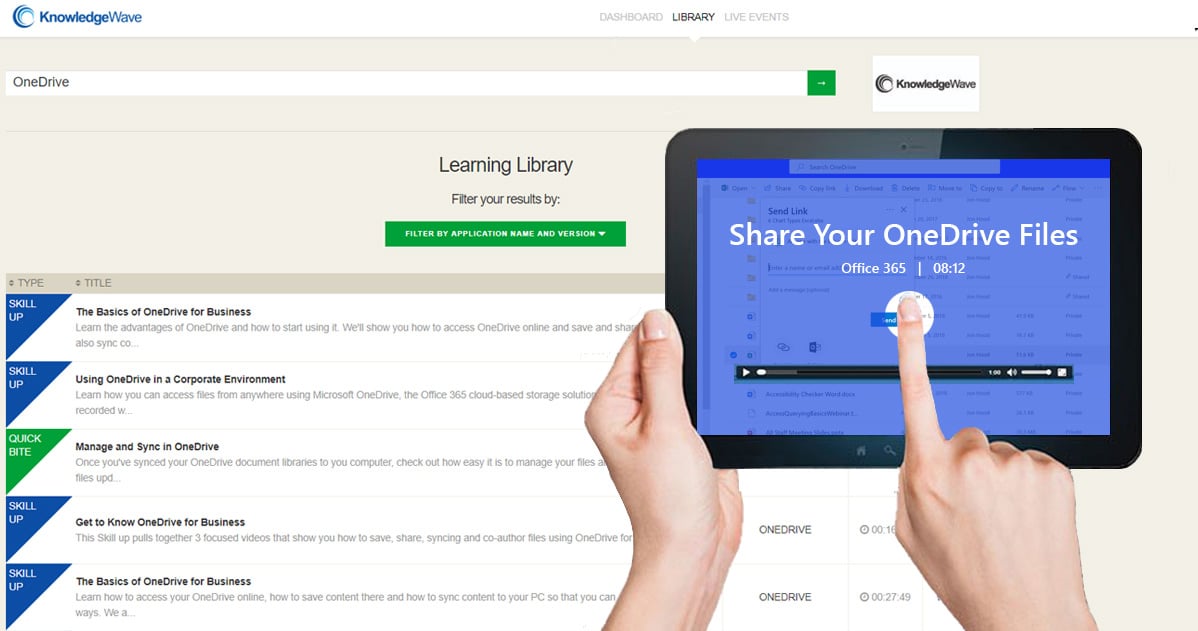
After you’ve made the decision to leverage the KnowledgeWave Learning Site (KLS) to assist with your user adoption of Office 365 you may want to add a custom KnowledgeWave tile to your Office 365 App Launcher.
There are two ways an Office 365 tile can function. If you are hooked up to use Single Sign-on (SSO) with KLS, users clicking the tile will seamlessly pass to KLS as authorized users. They will not have a separate KLS password. SSO clients will add this tile as part of their setup process with your success manager.
If you have not yet implemented SSO this post will show you step-by-step how to accomplish this task. Please note that you need to be an Office 365 Admin to add custom tiles. Since SSO is not part of this process the tile will link to the KLS member area, and users will still need to enter their KLS-specific password.
Add a KnowledgeWave tile to the app launcher
- Sign in to Office 365 with your work admin account.
- Select the app launcher icon
 and choose Admin.
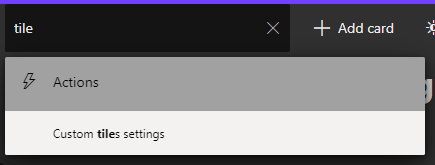
 - In the Microsoft 365 admin center, type tile in the search and select Custom tiles settings or use the left navigation pane by choosing Settings > Org Settings > Organization profile > Custom app launcher tiles.
NOTE: If you don't see the Custom tiles link, verify you have an Exchange Online mailbox assigned to you and you've successfully signed into your mailbox. Both are required for this feature.
- Choose + Add a custom tile.
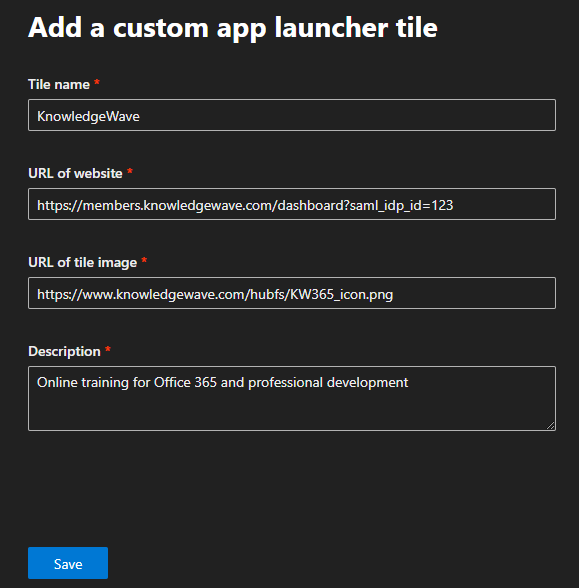
- Enter KnowledgeWave as the Tile name.
- Enter a KLS Log in URL. If you have SSO enabled, this is something like:
https://members.knowledgewave.com/dashboard?saml_idp_id=123. If not, please use the generic https://members.knowledgewave.com/dashboard. - Enter a Description for the tile. Your users see this when you select the tile on the My apps page and choose App details. We recommend: Online training for Office 365 and professional development
- Enter an Image URL for the tile. We provided an image for your use. You can link directly to this URL, or download the image and host it in a location of your choice: https://www.knowledgewave.com/hubfs/KW365_icon.png
TIP: If you are creating your own image, the image should be 60x60 pixels and be available to everyone in your organization. For example, you could store an image in a library on a SharePoint site and generate an anonymous guest link to use as the URL. You may need to first enable external sharing for this to work. -
Choose Save to create the custom tile. Your custom tile now appears in the app launcher on the All tab for you and your users.
Next Step: Promote the KnowledgeWave tile to the Home tab
- Select the app launcher icon and select Home
- Locate the new tile for your app, select the ellipsis, and choose Pin to home.

NOTE: If you don't see the custom tile created in the previous steps, make sure you have an Exchange Online mailbox assigned to you and you've signed into your mailbox at least once. These steps are required for custom tiles in Office 365.
IMPORTANT: Tiles added may not display by default. Office 365 let' s users choose which apps to pin for quick access.


