Previously, I shared What You Need to Know about Microsoft Teams Breakout Rooms. If you haven’t read that post, I’d recommend you review it because I shared some important details about who can create Breakout Rooms and I also highlighted some things Breakout Rooms can’t do, currently anyways.
In this post, I would like to share the step-by-step process for setting up and using Breakout rooms. This post is intended for meeting organizers.
Setting Up a Meeting that will use Breakout Rooms in Advance
Schedule your Teams meeting as you might normally do. Then follow these steps to rename your breakout rooms.
- Start your scheduled Teams meeting using the desktop app. This can be done in advance. Make it part of your prep. Don’t wait until the meeting starts. Plus, renaming the rooms ahead of time is cool.
- In the meeting controls, select the Breakout rooms button.
Reminder: Only the meeting Organizer will see this option!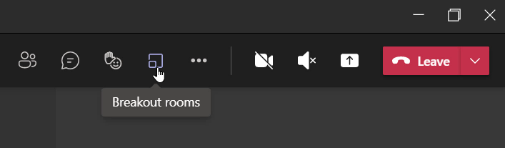
- Select the number of rooms you would like to create (max 50) from the dropdown list. Also, select whether you want to have Teams do the work for you and assign people to rooms (Automatically) or if you want to choose the people for each room yourself (Manually). I’m grateful for both options! The automatic option is helpful for larger groups. Teams will randomly place an equal number of meeting attendees into the rooms.
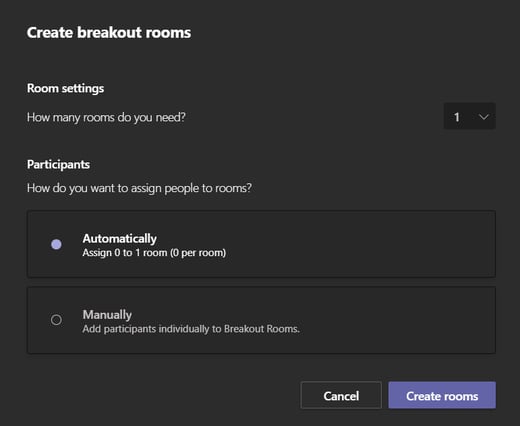
TIP: This is the only time you can choose to have people automatically assigned to breakout rooms. You won't be able to change this option later in the meeting. Auto shuffle would be a pretty cool feature! If you don’t select automatically, you will need to manually assign meeting attendees during your meeting. Unfortunately, you cannot assign meeting invitees to rooms in advance. - Then select Create Rooms!
You did it! When you start your meeting all the participants will be in the main meeting and then the participants will either be automatically moved (random) or moved to their assigned breakout rooms as soon as you open the rooms. What if there are two people who just can’t seem to get along, even in a virtual room? Or maybe you need to move a participant from one breakout room to the another. No problem! You, as the meeting organizer, can manually assign or reassign participants to different breakout rooms. This enables you to get just the right combo of personalities and balance for participation and moderation.

Rename the breakout rooms
 Tip: A good meeting organizer plans. Since you’ve created your Breakout rooms in advance of your meeting, you can rename them at the same time. You can still change the meeting room names in your meeting. You can also add an additional room or delete a room.
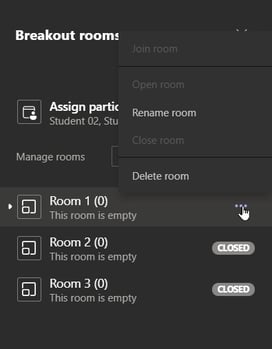
Rename each room to reflect the group of people it contains, what they’ll be working on, or anything else that is appropriate. To rename your breakout rooms follow these steps. If you don’t rename your rooms the defaults are not surprisingly, Room 1, Room 2, Room 3, etc.
To rename your rooms start your scheduled Teams meeting using the desktop app. Hover your mouse over the room and select More options ( ) and then click Rename room. Enter the new name and select Rename room.
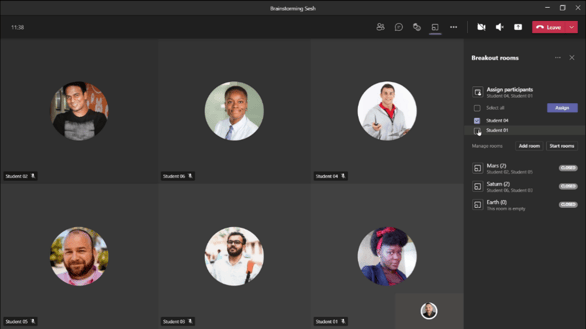
Assign people to breakout rooms manually
If you choose to manually add participants to breakout rooms, when you start your meeting and click the breakout rooms icon you will be able to assign those present in the meeting to one of the rooms you created.
- Select Assign participants.
- Select the checkboxes next to the participants who you want to move from the larger meeting to a breakout room.
- Select Assign and then select a room for those participants.
Using the breakout rooms in a meeting
By default, meeting participants are relocated to their assigned rooms as soon as you open the room. You can either open all the rooms at once or open rooms one at a time.
- To open all the rooms at the same time: Select Start rooms.
- To open a single room: Select More options (
 ) next to the room and then Open room.

You can open and close breakout rooms more than once during a meeting. This feature is nice if you want to bring all the participants back together, then segment them again.
Interact with breakout room participants
As a meeting organizer, you can join any of the breakout rooms, contribute to any of the room chats, and send announcements to a particular breakout room or to every breakout room.
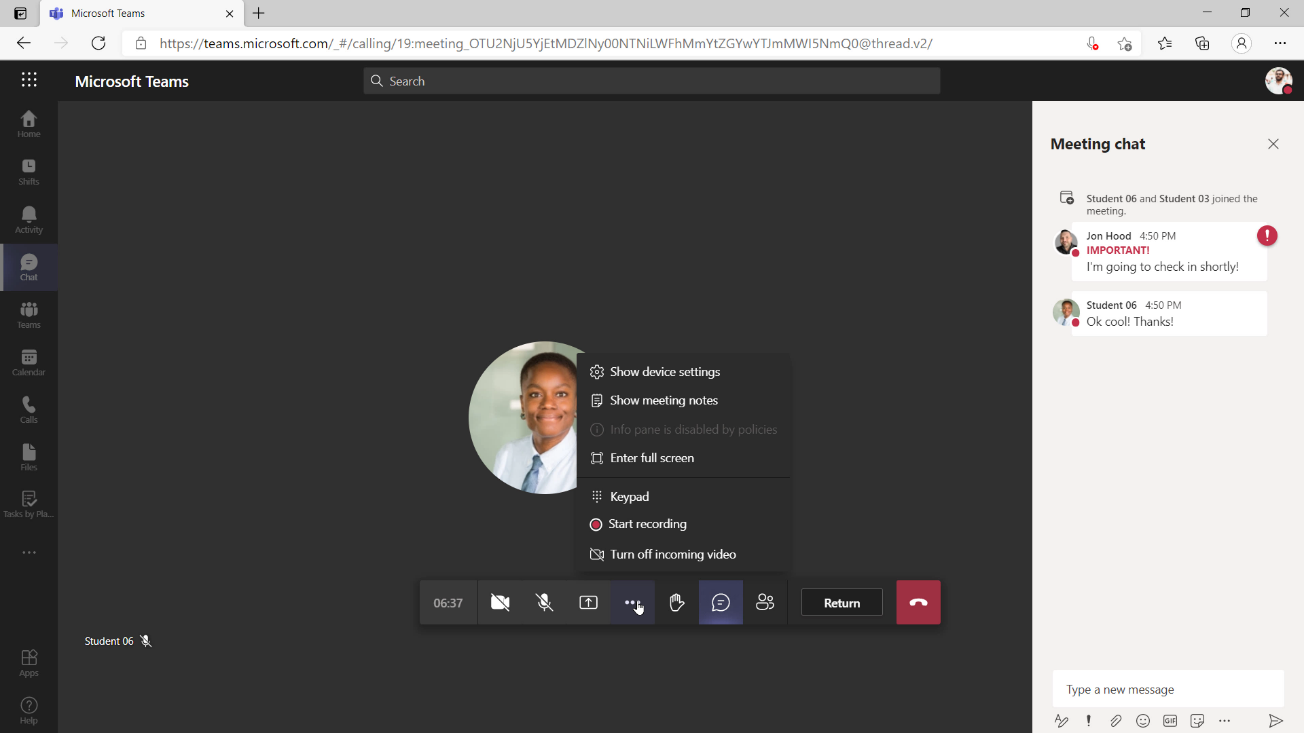
Join a breakout room as an organizer
- To join a breakout room: Select More options (
 ) next to the room and then Join room.
 - To leave a room: Select Return.
Reminder: Meeting participants cannot join rooms that they are not assigned to.
Send an announcement to all breakout rooms
As I mentioned before, it’s easy for the organizer to bounce around and participate in group chats, discussions, and activities. If you would like to send an announcement to all the meeting participants at once, across all chats, follow these steps.
- Select More options (
 ) at the top of the Breakout rooms pane and then select Make an announcement.
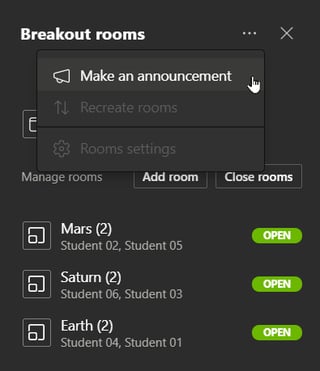
- Type in your announcement and select Send.
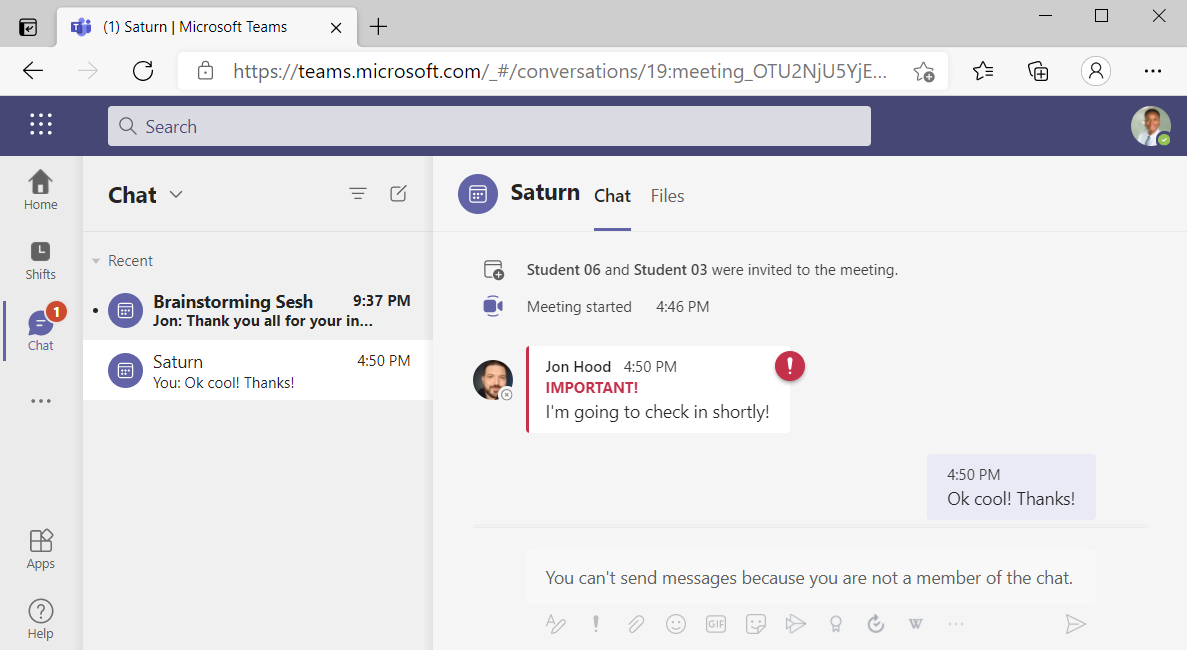
Participants will receive your announcement in their meeting chat and it is marked as important and shows up with an urgent notification.
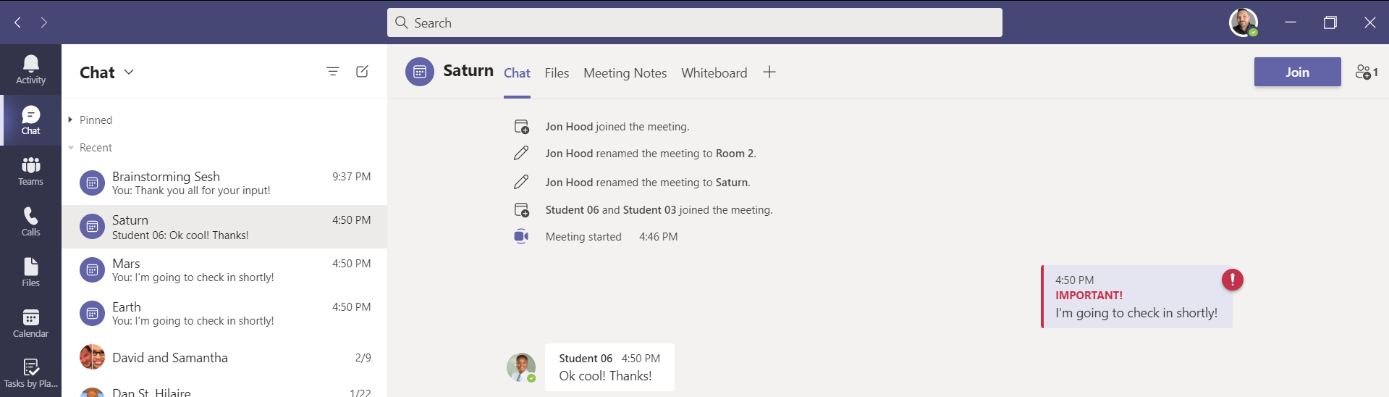
Chat in breakout rooms
Each breakout room has its own private chat, and as the organizer all the chats are available in your larger, original Teams Chat list. Once a breakout room closes, the room chat ends and cannot be continued. However, you'll still be able to view the chat history and any shared files. You can see below, a breakout group Chat tab and associated files, meeting notes, whiteboard, and any other apps that the group added with the + channel tab. Participants will be able to access the chat history and shared files from any breakout room they have joined, even after the meeting has ended.
Note: If you close a breakout room, and reopen the breakout room, this reopens the same chat.
As an organizer you can chat with the members of any breakout room individually, that chat is private. Only participants who are invited to the breakout room will see what’s been discussed in their breakout room. If someone wasn’t in a breakout room, then they can’t see the potentially confidential meeting content.
Close breakout rooms
When you close the breakout rooms, the participants return to the scheduled main meeting.
To close rooms individually:
- Select More options (
 ) next to the room, and then Close room.
To close all the rooms at the same time:
- Select Close rooms.
You'll know rooms have successfully closed when their status changes to Closed (grey).
When everyone is back from their breakout rooms and you're ready to meet as a larger group again, select Resume.
Note: Breakout rooms remain open until the organizer manually closes them.
Turn off automatic entry to breakout rooms
By default, participants are automatically moved into breakout rooms when they're opened by the organizer. When you turn off this option, participants receive a message asking them to join their breakout room. They select Join room (Join on a mobile device) before being moved. To edit this default, follow these steps.
- Select More options (
 ) at the top of the Breakout rooms pane and then select Rooms settings.
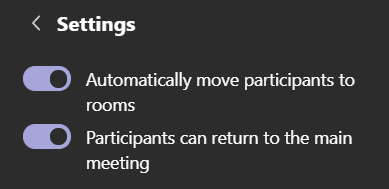
- Switch the toggle next to Automatically move participants to rooms to off.
Allow participants to return to main meeting
By default, this setting is off. Turning it on gives participants the option to leave their breakout rooms and return to the original meeting to rejoin the larger discussion.
- Select More options (
 ) at the top of the Breakout rooms pane and then select Rooms settings.
 - Switch the toggle next to Participants can return to the main meeting to on.
Move someone to a different breakout room
Currently, participants can be moved only when breakout rooms are closed.
- Expand the list of participants under a breakout room.
- Point your cursor to a participant’s name and select the check box that appears.
- Select More options (
 ) and then the breakout room you want to move that person to.
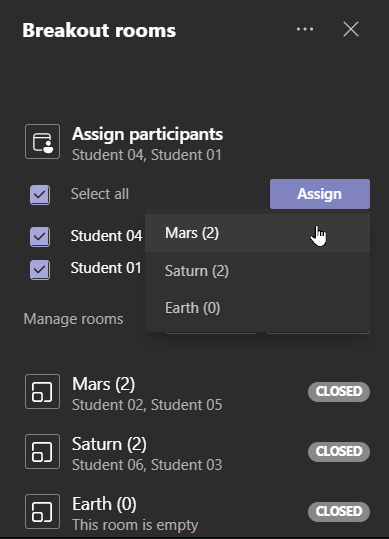
Ok, so that’s a LOT of how-to. As you can see, the organizer has a lot of control, but can’t be everywhere at the same time. I’d recommend having moderators or notetakers in each breakout room and if you want to access your content later on, you can. Also, test, test, test. Try it out! You can even test using Meet now!
Also remember, you still have all the other functionality of meetings with breakout rooms! So, don’t forget about features like sharing, recording, live captions, and transcripts!
Hopefully this was helpful and gets you as excited as I am about Teams!
If you're new to Teams or are interested in transitioning to using Teams at your business, check out some of our posts below:
- What You Should Know About Microsoft Teams
- Microsoft Teams Training Plan & Materials
- How to Rapidly Deploy and Adopt Microsoft Teams
- Get Started Meeting Like a Pro with Microsoft Teams
- How to Join a Microsoft Teams Meeting for the First Time