What is a Microsoft Teams Live Event?
A Teams live event is the perfect way to connect with people in a one-to-many format in your modern workplace. A typical Teams meeting allows two-way communication between two or more people. However, a Teams live event offers a solution for a much larger audience!
Structuring and delivering large broadcast-style events to reach employees, customers, and business partners, Microsoft Teams live events allow you to schedule and produce events to an audience of up to 10,000 attendees! This number may increase, you can monitor limits and specifications on the Microsoft Site. With Live Events, you can coordinate seamless and engaging online events like town hall-style presentations from anywhere in the world at any time, regardless of where your presenters/audience are located. You can stream live video and digital content via screen share to audiences both internally and publicly to get your message across to the masses.
Features of Teams live events include: Live Q&A, post-event recording downloads, attendee engagement reporting, live captions, and translation (choose up to 6 languages), as well as transcripts of the event. These are designed to enhance both the presenter and the attendee experience. I encourage you to explore Teams live events, as many organizations are maximizing their digital presence this way.
Attendees can participate just as easily as attending a Teams meeting and remember, moderated Q&A and live captions are available to enhance the attendee experience. Keep in mind that the most successful Teams live events are well-coordinated, as there is much more production involved. There is also a broadcast delay of approximately 20-30 seconds for the attendees, although this may vary. This is so the video is prepared live in the background for DVR-like functionality for the viewer.
Teams Meetings vs Live Events: What’s the difference?
There’s a time and a place for each of these choices, depending on your presentation needs.
- Why use a Teams meeting? They are designed for real-time collaboration and conversation between a group of individuals (up to 250 at this time but will be increasing this year). Attendees are given the opportunity to mute or unmute. There are many participation tools available (like sharing screens, hand raising, and a whiteboard) and is best suited for smaller collaboration vs a more structured one-to-many presentation.
- Why use a Teams live event? They are designed for presentation-style events to a larger group (up to 10,000 at this time) and most of the attendees can view only. A standard live event allows multiple, presenters who can share audio, cameras, and their screens to present content. They do not need to be located in the same place. However, if the meeting is taking place in a larger room and the organizer chose to capture it using a professional video production crew, presenters must be in the same location as the video crew.
There are two ways you can produce a live event:
- Utilize the power of what you already have—Microsoft Teams. It’s a lightweight option to create the event and invite presenters and panelists to participate on their own devices.
- Use an external app or device with a professional camera, video production crew, and sound setup. Use this option if you already have a production setup (for example, media mixers) that supports streaming to an RTMP service. This method is typically used in auditorium events, such as town halls, where a stream from a media mixer is broadcast to the audience.
Team Roles
Organizer, Producer, Presenter, and Attendee
Organizer
The organizer is responsible for scheduling the live event. They ensure the event is set up properly with the desired permissions for attendees and who will be managing and running the event.
- Creates the live event
- Sets attendee permissions
- Selects the production method
- Configures event options (video availability and Q&A, for example)
- Invites the attendees
- Selects the event group members
- Manages generated reports after the event is over
Producer
The producer is a host who makes sure attendees have a great viewing experience by controlling the live event stream.
- Starts and stops the live event
- Shares own video
- Share participant video
- Shares active desktop or window
- Selects layouts
Presenter
The presenter is responsible for either presenting audio, video, or a screen to the live event, or moderates Q&A. A Teams live event can be run by one or more presenters but there can be only one active presenter at a time. However, the event can be handed off to another presenter at any time. Presenters can only share audio, video, or a screen (desktop or window) in live events produced in Teams.
Attendee
The attendee is simply a viewer and can watch the event live or on-demand, either anonymously or authenticated through the organization. They can also participate in moderated Q&A during the event, which is hugely helpful for engagement with larger audiences.
Though the presenter(s) will use the Teams desktop application to record the presentation, the attendees can view the presentation in a web browser that will not require the full version of Teams.
Scheduling Teams Live Events
1. From within the Teams desktop application or the Web app, select Live Event from the drop-down in the Teams calendar to begin creating the event.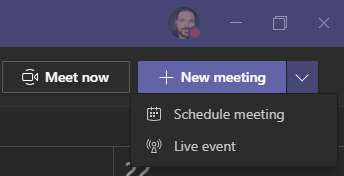
2. Set up your live event by adding a title, location (optional), times, details (optional), and invite people as either producers or presenters.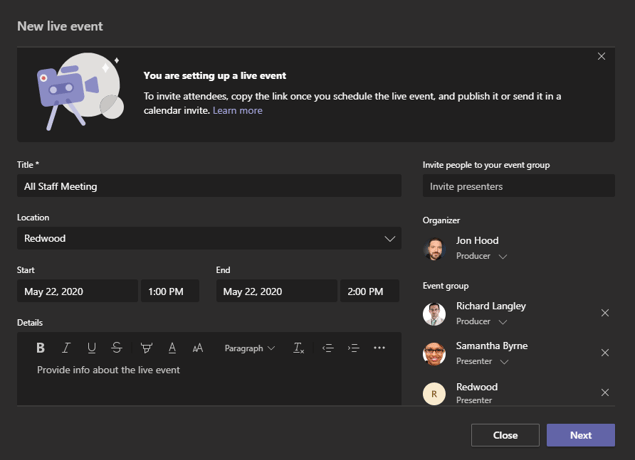
3. Choose 'Next'.
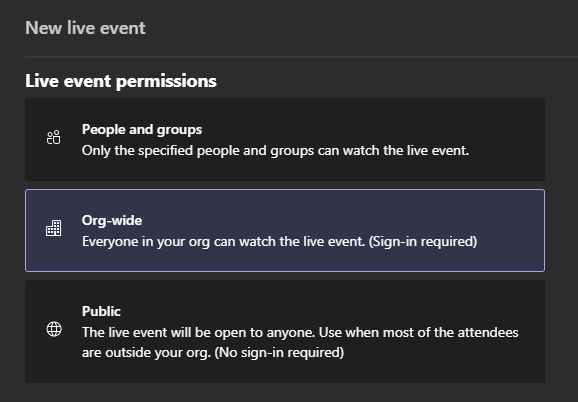
4. You can now choose live event permissions.
- People and groups: Only the specified people and groups can watch the live event.
- Org-wide: Everyone in your organization can watch the live event. They must sign-in.
- Public: The live event will be open to anyone. Use when most of the attendees are outside your organization. No sign-in is required. You may notice that the public option is grayed out. By default, it is turned off, so you’ll need to contact your IT admin team and request it to be enabled.
5. Next, you’ll see two options for how to produce your live event. Using Teams or an external app or device. In this blog, I’ll focus on using the Teams option since this will suit most presentation needs. Content will be shared from the presenter’s webcam and screens.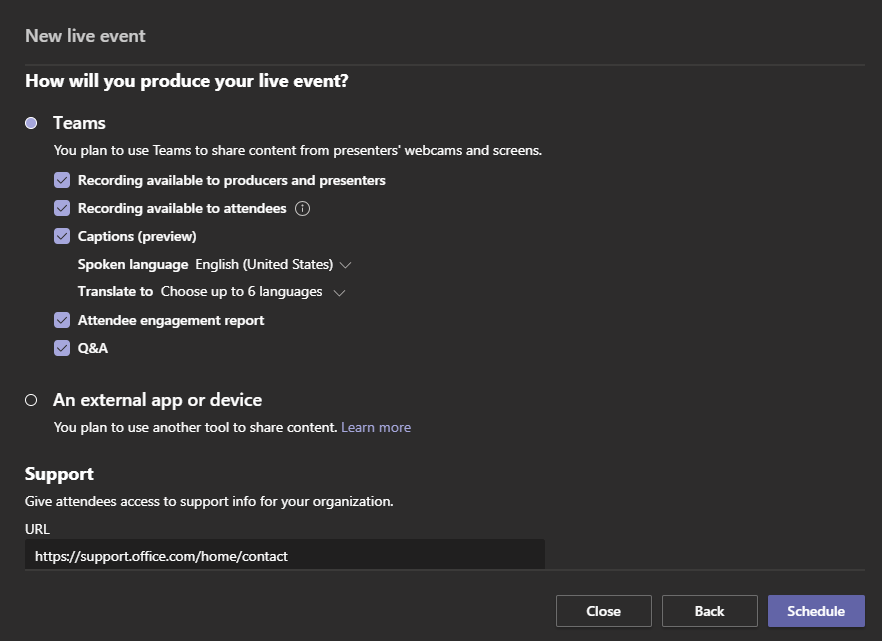
6. You’ll see check boxes where you can make your choices. Some of the options seen may not have been enabled by your IT admin team, so you may need to request them to be enabled. Options include the following:
- Recording available to producers and presenters.
- Recording available to attendees: a recording of the event will be created for anyone that missed the event or for those who would like to watch the event later.
- Captions: you’ll be able to see text captions created based on the audio and you’ll have the option to translate to up to six languages
- Attendee engagement report: download a report which gives you information on the attendees.
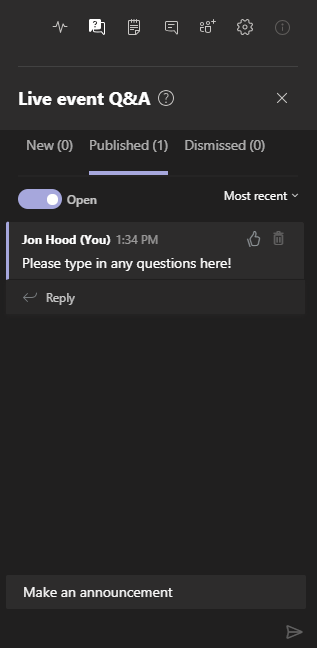
- Q&A: by default, this is toggled off. Check the box if you want attendees to be able to ask questions during the event. This is a great tool for participation since the attendees are always muted.
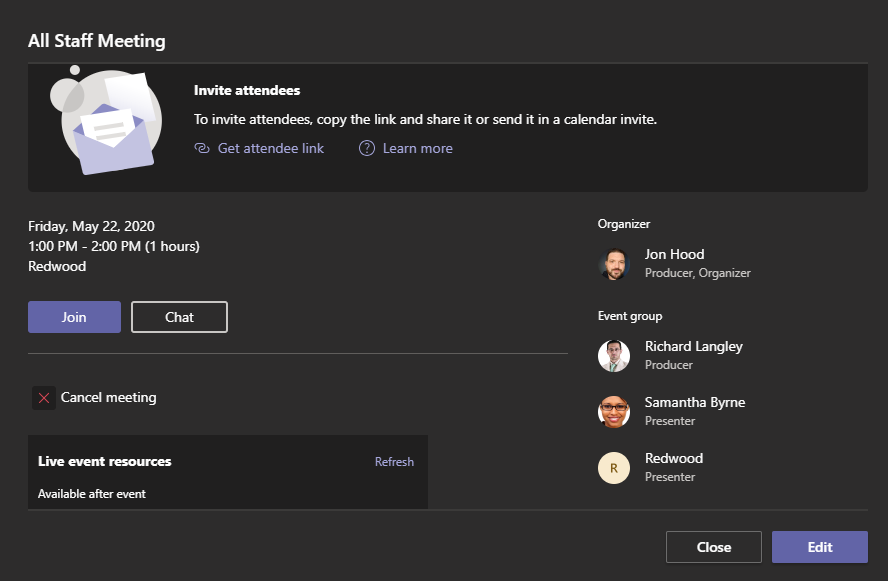
7. Once you’ve selected your options, click the Schedule button and you’ll see the following summary screen. To invite attendees, copy the link, and share it using a Teams channel or email. Teams will not invite people automatically to the event. You may also join or edit the event at any time using this summary screen. Access it later by opening it from your calendar, when needed.
Start a Teams Live Event
Once you’ve scheduled the event and sent the invitation link to the attendees, you’re ready to get started!
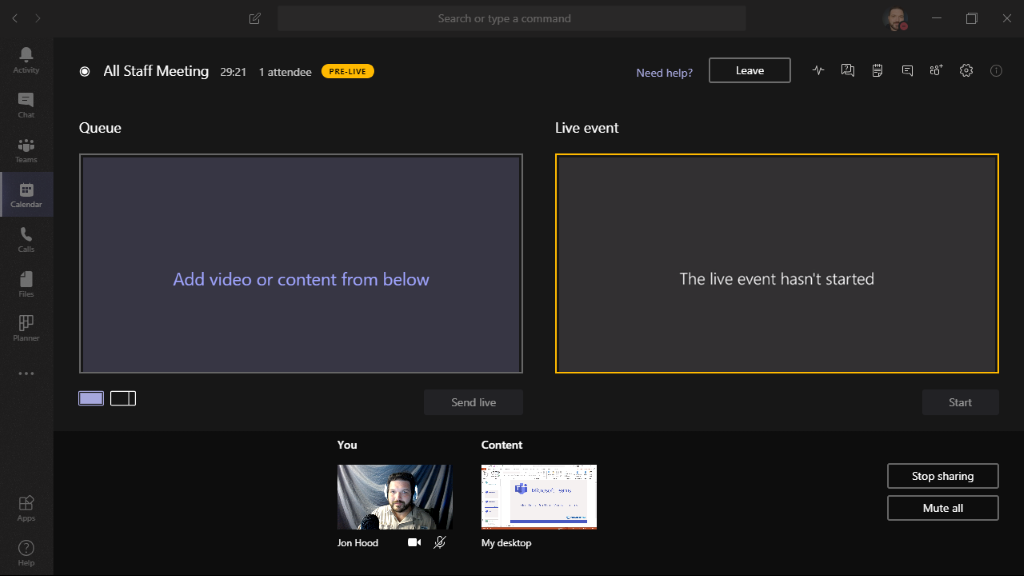
1. From your calendar, join the event. Nothing has officially started yet, but you’ll see two preview screens once the interface loads.
2. The left screen allows you to queue up the first thing that you would like to broadcast. The right screen is what viewers will see in real-time, while the bottom pane shows presenters and producers.
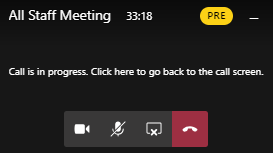
3. Make sure that your audio and video solutions are selected and working properly before you broadcast yourself. The meeting is in pre-live mode at this time, and attendees will see a screen that reads “The live event hasn’t started”.
4. Select the 'Share' button to share video, other content (a selected application window), your full desktop, or a PowerPoint presentation
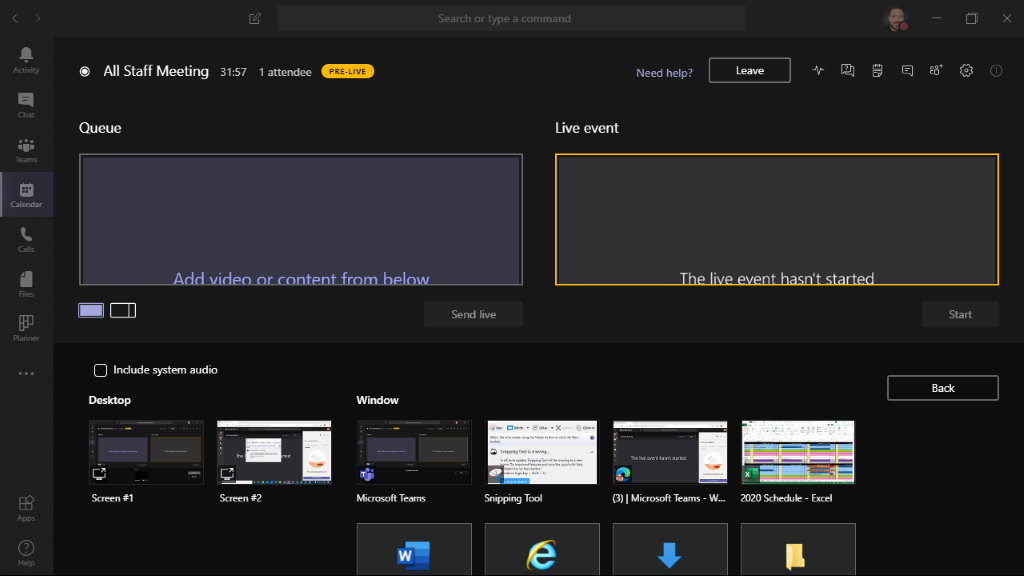
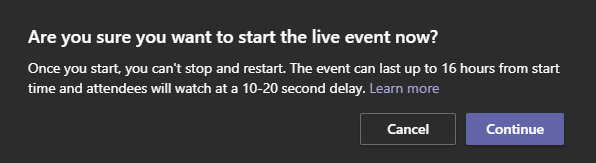
5. Once video or content from the bottom pane is queued up, select 'Send live' so the audience can see your presentation. Remember, the event can’t be stopped and restarted. It can last up to 16 hours from the start time and there is a 10-20 second delay. Select Continue when you’re ready.
6. On the next screen, you’ll see that the event has changed from pre-live to live.
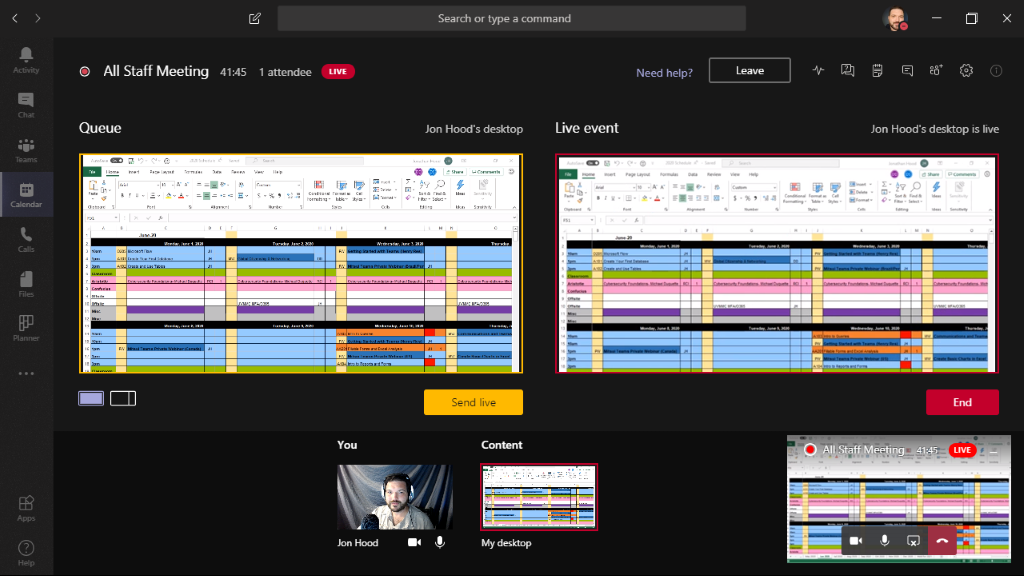
7. If you’d like to switch to another source (including video from another presenter), click on the content in the bottom pane and it will appear in the Queue window. Click Send live to share with the live event. The attendees/viewers will only see what you have on the right screen. When you share something in Teams, you’ll notice that the chosen content will have a red outline and you have controls over the presentation. There are controls on the top of the screen to hand control to another presenter, as well as a control on the bottom right (that can be moved around) that enables or disables video and audio, stop sharing, or you can leave the event. The Teams interface may disappear when you select content. Double click on the bottom controls to return to Teams either before or during the start of the event.
8. You’ll notice icons in the upper right-hand corner that will allow you to do things like create notes for the event, chat with other presenters, or invite new presenters, if needed. The viewers will not be able to see this menu. If enabled, you’ll see an icon that allows for interactive Q&A during the event.
9. At the end of your event, you can either leave (this allows you to exit without ending it, just make sure there is at least one presenter still participating) or choose End to completely end the event.
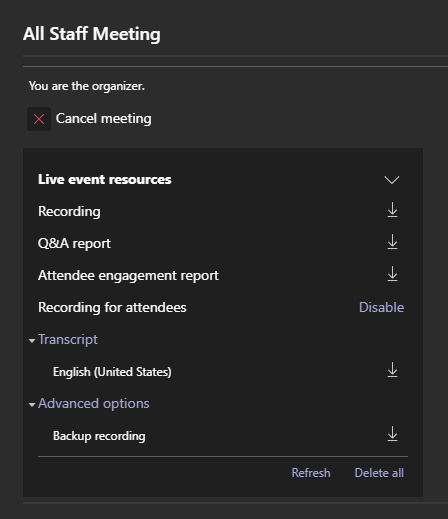
10. After the conclusion of the event, you can access things like a .mp4 recording, the Q&A report, attendee engagement reporting, a transcript, as well as additional options. This menu can be accessed by opening the event on your Teams calendar.
11. That’s it! Keep in mind that Microsoft Teams live events require much more practice time than a typical Teams meeting. There’s a lot more production involved and several moving parts. I’d recommend running a test event to work out all of the potential kinks and practice collaborating. Give it a try! I’m sure you’ll find this method of presentation to be both professional and highly effective.
Attend a Teams Live Event
Microsoft Teams live events are very easy to join from anywhere. Watch the live event and participate in the moderated Q&A through Teams desktop app or through the Teams web app. You are not required to have Teams to attend! These events are designed to be listened to and viewed only, so you won’t be able to share audio or video. Again, you can ask questions during the event, even anonymously. Here’s how to successfully attend:
1. Open the live event link that was provided to you to join the event.
2. If you are currently using the Teams desktop application, the event will open up right away.
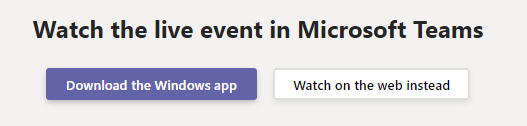
3. If you are opening using Outlook on the web, for example, you have the choice of joining using the web app or the desktop app.
4. You’ll see the message “The live event has not yet started” if the event hasn’t started.
5. If the event is open to the public, you’ll join as an authenticated user if you’re already signed in to Teams. If you’re not signed into Teams, you’ll be able to join anonymously online using the web app.
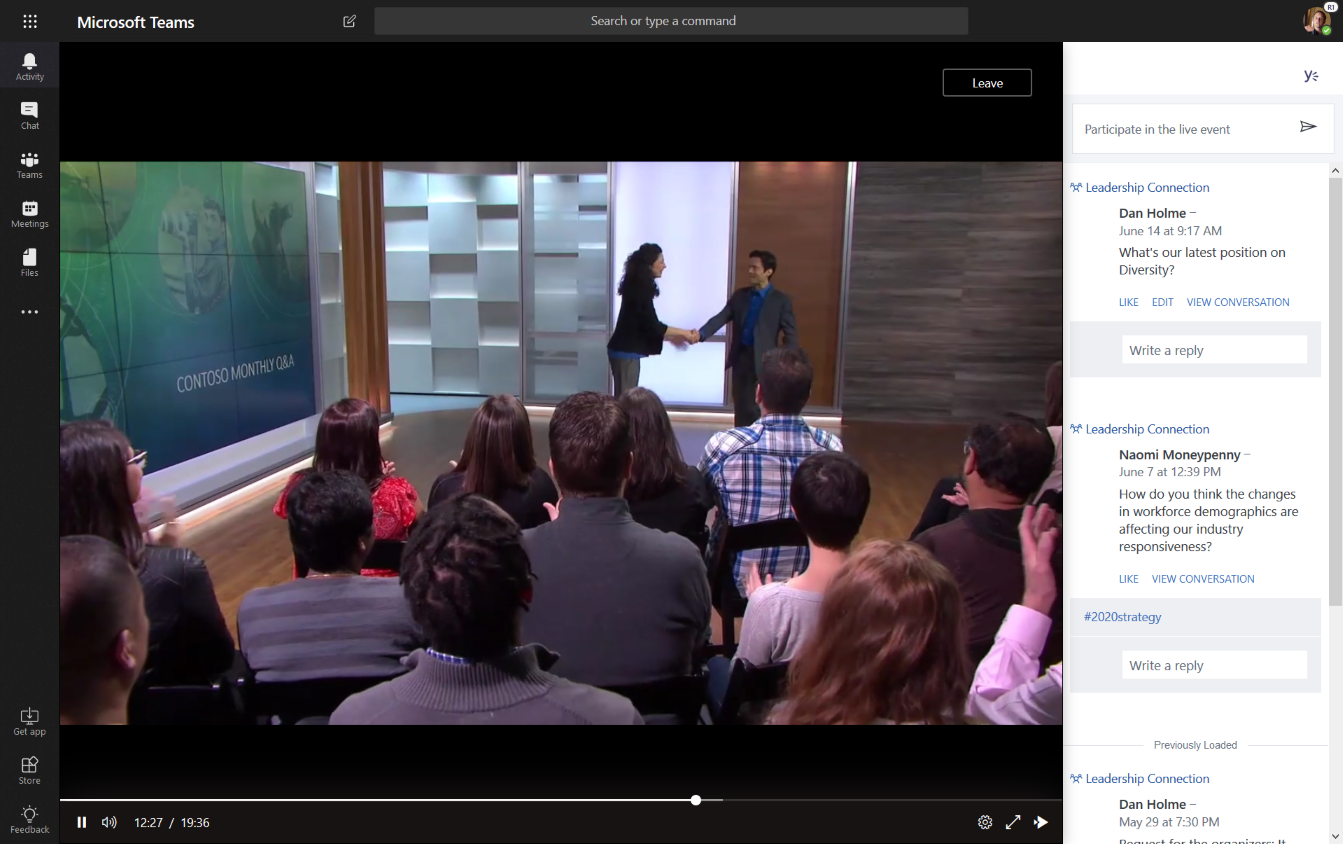
6. Once the meeting has started you’ll be able to see the presented content and participate in the live event Q&A, if enabled by the organizer. You can ask questions at any time, even post them anonymously! You can even pause and replay the event as you’re watching.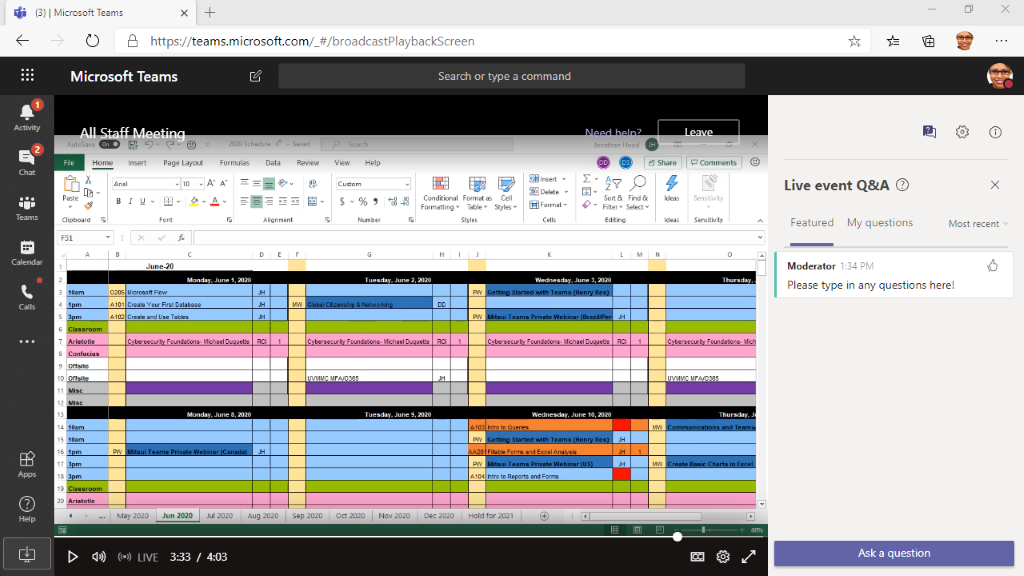
7. Once the live event is over, you can still watch the recording, if set up by the organizer. All you need to do is follow the same link you used to join!
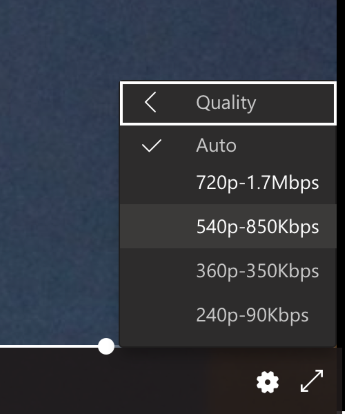
8. If the live event begins and the resolution/quality is low, you can manually reset it to a higher resolution by clicking on the gear on the bottom right.
9. Participate in the live moderated Q&A session during the live event!
About KnowledgeWave
For the past 20 years, KnowledgeWave has been helping companies deploy and adopt the latest business software. We stay up to date with the most recent software features and are constantly adding additional training to our online learning library, the KnowledgeWave Learning Site.
As a Microsoft Partner, we stay on top of all the newest features released within Microsoft Teams and Office 365. We pride ourselves on having helped hundreds of organizations throughout North America deploy business solutions for their organizations.
If you are researching, considering, or planning on deploying Teams or Office 365 within your organization, let us help guide you through the process. We offer:
Other Microsoft Teams Related Blogs:
- Microsoft Teams Training Plan & Materials
- 4 Advantages of Microsoft Teams with Office 365
- How to Rapidly Deploy and Adopt Microsoft Teams
- What You Should Know About Microsoft Teams
- An End-User Introduction to Microsoft Teams


